Showing posts with label bread. Show all posts

Saturday, November 5, 2011

Brioche Sticky Buns with Homemade Toffee Sauce


Hey guys...you see I'm still playing hide and go seek with you? Things have been so hectic that I hardly get the time to write. Don't get it twisted though...I still cook most every day but my hands don't go past the sentence or two attached to the pic I send to facebook to show what I made.  But no more excuses, here is the recipe for the Sticky Buns I made about two weeks ago. These are so soft, buttery, and decadent. I don't like nuts so I opted to use raisins (even though I cant stand those too much either) in the dough. I soaked them that morning for about an hour in a mixture of rum and water. Plain water or juice is fine if you cannot have alcohol. As for the toffee sauce, make it before you roll out your dough. I have extra vanilla bean pods laying around from when I scrape out the pulp. I just threw those into the mixture to boil and give it exceptional vanilla flavor.  These really were a treat for the entire family.
The brioche is a super quick method from the book "Artisan Bread in 5 minutes a day". The bread is mixed up in a few minutes, no kneading or kitchenaid necessary, then chilled in the fridge overnight or up to 5 days. I made my dough the night before I wanted to bake it and let it chillax in the fridge. I must say handling this dough is no easy feat as its on the wet side. I used my silpat, a bench scraper, and a handful of flour to make it a bit easier. This dough is supposed to yield four loaves but it gave me a 10 inch pan of sticky buns and 2 full sized loaves. I left one loaf plain and the other I filled with a crushed almond, cinnamon, butter, rum, and raisin mixture. Everything was just spectacular. I hope you enjoy eating this as much as I did.

Brioche Sticky Buns with Homemade Toffee Sauce
Makes 10 large sticky buns
1 cup raisins
1/2 cup rum
1/2 cup water
1/2 cup ground cinnamon
1 tsp ground ginger
1/2 tsp ground nutmeg
1/4 tsp ground clove
pinch of  ground allspice
1/2 cup brown sugar

Toffee Sauce
1 1/2 cup + 2 tbsp brown sugar
4 tbsp dark corn syrup
1 1/2 stick unsalted butter
1 1/3 cup heavy cream
vanilla bean pods, optional

- Place raisins in small bowl to soak in mixture of 1/2 cup rum and 1/2 cup water, set to the side.
- Make toffee sauce first by combining brown sugar, corn syrup, butter, and vanilla if using over medium heat.
- When mixture comes to a boil add in cream and cook over low heat until thickened, about 5 minutes.
- Turn off mixture and place to the side.
- Remove brioche dough from refrigerator and roll out to a large flat square, about 1/3 inch in thickness.
- Combine cinnamon, ginger, nutmeg, clove, allspice, and brown sugar. Sprinkle mix over rolled out dough.
- Drain raisins from liquid (reserve liquid) and sprinkle evenly over dough.
- Start to roll dough into cylinder shaped log.
- Cut dough into even rolls
- In a 10 inch pan pour all of the toffee sauce into the bottom and place buns on top of the sauce.
- Let dough rest an hour before placing in a 350 degree oven.
- Bake 35- 40 minutes.
- Unmold immediately and serve.

** Toffee sauce from Foodnetwork.com

Saturday, July 30, 2011

Whole Wheat Hamburger Rolls.


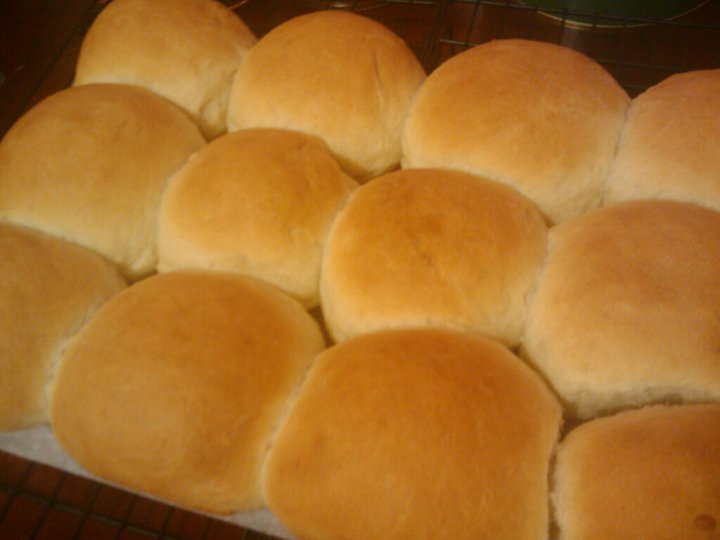
Eating hamburgers in my house always leaves us with the same dilemma all the time...large burger and small bun. The veggie and salmon burgers we usually buy are a bit larger than the standard hamburger buns sold in the supermarket. This summer I have tried to make hamburgers buns twice. The first time I tried a recipe from king arthur flour but the results were almost to flat to split. My second attempt yielded much better results. I also started keeping boiled potato water to make my bread with as I've heard it works as a natural preservative for bread and gives you a softer loaf.  The recipe I used was from allrecipes.com. I tweaked the recipe by using part whole wheat flour, raw turbinado sugar, and potato water. The substitutions made is part of my plan to eat a lil bit healthier everyday but you can definitely follow the original recipe if you like.  These lovely buns came out large enough to accommodate a 4-5inch burger, with incredible softness, and a beautiful crust. If your wondering why they aren't shiny like most hamburger buns that's because I didn't use any egg wash..my family doesn't care for it, but Ill post it in the recipe so that you have the option of using it. 

Whole Wheat Hamburger Rolls
Makes 12 rolls

1 cup milk
1 cup potato water or regular water
2 tbsp butter
1 tbsp granulated sugar
1 1/2 tsp salt
1 1/2 cup whole wheat flour*
2 1/2 cups all purpose flour*
1 1/2 cups bread flour*
2 1/2 tsp instant yeast
1 egg yolk
1 tbsp water


- Warm milk, water, sugar, salt, and butter in saucepan.
- In bowl of stand mixer combine flour(s) and yeast.
- Pour milk mixture into flour and mix on low speed with dough hook attachment until soft uniform ball forms.
- Place dough into a greased bowl, cover and let rise one hour.
- After one hour punch down dough and divide into twelve equal portions.
- Shape dough into rolls and after 1 minute press down each roll with the palm of your hand. 
- Place rolls on a baking sheet lined with foil or parchment paper.
- Let rise until doubled in size.
- While rolls are rising heat oven to 400 degrees.
- If using egg wash  mix yolk and tbsp water together, brush on top of rolls.
- Place rolls in the oven and bake for 10-15 minutes.
- Remove from oven and cool.
- Serve with your favorite burger!


* I mixed different flours together but the original recipe uses entirely all purpose flour. 

Friday, July 29, 2011

Portuguese Sweet Bread.

Portuguese sweet bread is a soft crust, rich bread with a slightly sweet taste. if you need to compare it to something it taste just like the Kings Hawaiian rolls you get in the grocery. I always loved getting kings hawaiian rolls during the holidays from my uncle who lives on the west coast. Now I could easily buy them in my local grocery but I also wanted to try making my own. I made portuguese sweet bread once in Baking 1 my sophomore year of college but I thought it was time that I try it again. I have a recipe for portuguese sweet bread in my baking text book from school but its too large scale so I tried a recipe I found on allrecipes.com good reviews.

Portuguese Sweet Bread
1 cup milk
2 Tbsp margarine or butter
1/3 cup granulated sugar
2 1/2 tsp instant yeast
3 cups bread
3/4 tsp salt
1 large egg

- Warm milk and margarine to no more than 100 degrees.
- Stir sugar into milk until dissolved and then add in yeast.
- While milk mixture sits add combine flour and salt in bowl of stand mixer.
- Make a well in the middle of te flour and place egg.
- Finally add in milk mixture to flour and attach the bowl to stand mixer.
- Mix on speed 2 with dough hook until a soft dough ball forms.
- Place dough in a greased bowl and let it rise for one hour.
- Punch down dough after one hour.*
- Place dough into a greased loaf pan or a round 9x3in cake pan.
- Let dough rise and additional half hour before placing in a 375 degree oven.
- Bake bread for 30 - 35 minutes.
- Remove from oven and baking pan, cool on a rack.

* Punching dough is the process of removing the CO2 that built up during the first rise by gently pressing your hand into the dough.

Friday, July 15, 2011

Trinidad Coconut Drops...Diabetic/Sugar Free Version


Don't open yuh eye big so...coconut drops can be made sugar free and still remain tasty. Traditionally Trinidad coconut drops are little sweet dense mounds that are a cross between bread and cake. The smell of these little buns of tropical goodness baking send your senses straight  to the Caribbean with the scent of coconut, rum, and spices. I usually make coconut drops with regular sugar but since my mom has to watch her sugar intake I decided to make these sugar free. The main sweetener for this recipe could have easily been splenda but since my mom is skeptical about artificial sweeteners I decided to go the all natural route with agave nectar. In short agave nectar is a sweetener derived from the Mexican cactus like agave plant...you can learn more here.

  For my mom I decided to use part whole wheat flour and part all purpose flour to add to the nutritional value of the drops, but you can choose to make the recipe using all purpose flour alone. Another tip for baking drops is to soak your raisins so that they don't dry out while baking. I soaked my raisins in a mix of cherry brandy and Angostura Single Barrel rum but water can be used to soak raisins as well.

Since many people both old and young have dietary restrictions when it comes to sugar I decided this would be a great recipe to post so that my diabetics and pre-diabetics can still enjoy delicious homemade coconut drops. I will also experiment with other flours such as whole grain and rice to see if I can develop versions to accomodate other diets. Will Keep you all posted in the mean time Happy Baking!

Sugar Free Trinidad Coconut Drops
Makes 6

1/3 cup raisins, soaked in rum or water
1/2 cup unsalted butter
1/4 cup agave nectar
1 large egg
2 tsp vanilla extract
1/4 tsp cola essence, optional
1/4 tsp almond extract
1/2 tsp lemon zest
1/2 cup whole wheat flour
3/4 cup all purpose flour
1/2 tsp grated nutmeg
2 tsp ground cinnamon
1 tsp baking powder
1/4 tsp salt
2 cup grated coconut


- Soak raisin in small bowl at least 1hr before baking.
- Prepare sheet pan by greasing or lining with parchment paper. Heat oven to 350 degrees.
- Combine flour(s), nutmeg, cinnamon, baking powder, and salt
- Melt butter and place in mixing bowl along with agave nectar. Mix on medium speed until well blended and emulsified.
- While butter and agave mix, combine egg, extracts, and lemon zest in small bowl.
- When agave and butter emulsify add in egg mixture and mix until combined.
- Add in coconut to mixture and combine.
-Add in flour mixture, mix until just combined.
- Add in raisin, leaving reserving the liquid to the side.
- Divide batter into 6 equal portions
- Shape into circular mounds

- Place in oven and bake for 20-25 minutes.
- Remove from oven and brush lightly with rum mixture raisins were soaking in. (Omit this step if you used water)
- Cool and enjoy

Wednesday, July 13, 2011

Trinidad Butter Bread


Keeping theme with yesterday here is a next Trinidad recipe. Trini butter bread is one of those recipes right up there with Trinidad Hops Bread, its a favorite with the Caribbean massive. Trini butter bread is a dense, filling bread with the taste of butter baked right in. At my local Trinidadian bakery by me this bread always sells out! Butter bread is a favorite of mine and I use to regularly buy a loaf from said bakery but I decided it was time that I try to make my own. While searching online I realized there was no real recipe for Trinidad butter bread. I decided that once the experiment was successful I would be able to put it on a platform to share with Trini's and non-Trini's across the globe. My sister gave me some tips she found out on how to make the bread and I also enlisted the help of my mom...yes there was a three man team to bake two loaves of bread...don't judge me.
My mom and I tried the recipe completely from scratch, we just started scooping flour an prayed for success. I have to note that Trinidad butter bread isn't baked in loaf pans but on a flat baking sheet, so once you use parchment paper there really isn't any clean up. This bread came out better than what I am used to buying and I am so excited to share the recipe with you all...hopefully this bread will become a staple in your home adding a lil' Trini flavor to your baking repertoire.
Trinidad Butter Bread
makes 2 loaves
8cups flour
2 1/2 tbsp instant yeast
1tbsp salt
4tbsp granulated sugar
1/2cup + 2tbsp vegetable shortening
1 cup warm whole milk
1 cup warm water
4 tbsp melted butter

- Combine all ingredient except butter in bowl of stand mixer fitted with dough hook and knead until a soft, smooth ball is formed.

- If you don't have a stand mixer melt shortening in small bowl in the microwave. Add sugar, milk, and water to shortening along with yeast. *Take care that the liquid mixture isn't too hot or it will kill the yeast, it should just be warm to the touch. Place flour and salt in a large bowl and combine. Form a well in the center and add in liquid mixture. Knead by hand until you form a smooth ball.

- After kneading shape into a ball and place in a large bowl, cover with plastic, and let rise 1 hour.

- After one hour punch down the dough,divide into two equal pieces, and roll into two flat circles.

- Brush each circle with 1tbsp melted butter.
My mom is working hard!
- Roll each circle into a flat cylinder shaped loaf and place on a baking sheet covered in parchment paper.
Ignore my oven thermometer...its seen better days lol!
- Let Loaves rise for 30 minutes. During the last 15 minutes light the oven to 350 degrees.

- Before placing loaves in the oven brush each loaf with 1tbsp melted butter.

- Bake loaves for 25-30 minutes at 350 degrees. If loaves are browning to quick lower oven to 300 degrees and bake for the remainder of time.

- Remove loaves from oven and brush each loaf with 1tbsp butter each.

- Cool and eat.

Sunday, November 28, 2010

Pot Bread

The inside of the second loaf.


Have you all ever heard of pot bread? I know I hadn't until I was perusing through one of my favorite blogs and happened upon the recipe. I'm a visual person and just by the looks of the bread in the photo I decided that It was a must try, it was also a great way to use the Rachel Ray cast iron casserole dish that was begging to come off the kitchen bench. I made this recipe twice trying out the different fermenting times that were suggested. This recipe said that the dough would need to ferment between 12 to 18 hours  and then after a final addition of butter it would need to sit for another 2 hours or so. I decided to follow the exact measurements (outside of letting my bread sit in a about 1/2 cup olive oil while it fermented) and use a 12 hour fermenting period the first time and see what my results would be. The bread from the first batch was absolutely wonderful. The crust was crispy and buttery and the inside was just a chewy goodness. The bread was so flavorful that it didn't need any butter or cheese in my opinion. I gave my first batch 2 thumbs up! I have a pretty large oval cast iron pot to put the bread in but it did not fill the pot enough to give me the height I would like my loaves to have, so for my second try I decided to do one and a half times the recipe and I also let it sit for the full 18 hours. When I checked the bread in the morning to mix in the butter it was bubbling like swamp thing but it smelled fine. After it rose a second time and the dough was placed in the oven I noticed the scent of great bread still filled the house so I assumed everything was fine. When I took the bread out it had the same wonderful crust and color but after my first taste I realized that my dough was reminiscent of sourdough. I am a fan of sourdough but that s not what I was going for and it was a hit or miss amongst the family whereas the first one was a absolute hit. I would recommend letting this dough sit only for 12 hours and I would like to tell everyone that I didn't use all purpose flour but bread flour. When making breads where you want to achieve a chewy texture bread flour/high gluten flour is the way to go.
The first loaf

The inside of the first loaf.

The outside of the second loaf.


No-Knead White Bread (bakingbites.com)


4 cups all purpose flour
2 tbsp sugar
2 tsp salt
3/4 tsp instant yeast
1 3⁄4 cups + 2 tbsp ice water
2 tbsp butter, melted and cooled
In a large bowl, stir together flour, sugar, salt, yeast and ice water until well combined. Dough should be thick and slightly sticky. Add a few tablespoons more flour if dough is too soft; add a bit more water if it is too dry and the flour is not incorporating well. Brush top of dough with some vegetable oil to prevent sticking, then cover with plastic wrap and let stand at room temperature for 12-18 hours.
Pour melted butter into risen dough and stir vigorously, until well incorporated. Cover bowl again and let dough rise for 2 – 2 1/2 hours.
Preheat oven to 450F. Place a dutch oven inside for about 20 minutes, until both it and the oven are hot.
Remove dutch oven from oven and, working carefully, pour bread dough into the dutch oven, trying to deflate it as little as possible. Sprinkle with water and put the lid on the oven.
Lower oven temperature to 425F. Bake bread for 50 minutes with the lid on. Check the bread to see if it is browning. If not, remove the lid at this point. Bake for an additional 20 minutes. Check the bread with an instant-read thermometer and when it has reached about 207F it is done.
Turn bread out onto a wire rack to cool before slicing.
Makes 1 large loaf

Tuesday, November 9, 2010

Soft Pretzel Rolls


I know I know...I have been away for some time but its almost the end of the semester so its crunch time. But I do have a treat for you..some yummy soft pretzel rolls topped with sesame seeds and poppy seeds. I wanted to do a pretzel recipe for some time and when I saw this recipe on Allrecipes.com I decided I would try it. The recipe calls for all purpose flour but I used bread flour since its high gluten content would give me the chewiness I look for in pretzels. When going through my ingredients I noticed I ran out of kosher salt so substitutions were in order...to top my pretzels I sprinkled some table salt and topped them with sesame seeds and poppy seeds. The pretzels proved easy to make up until it was time to shape them...I have a silpat-esque mat so that was helpful to roll them out but I couldn't really get the hang of shaping them. When I put my pretzels in the baking soda bath they took on another shape and that's how I ended up with twist instead of traditional pretzels...not a problem all yummy nonetheless. The texture and taste of these pretzels were divine. Slight crunch on the outside and chewy buttery goodness on the inside. I already planned to modify this recipe into rolls for Christmas. I hope that you all decide to give this recipe a try and get a taste of NY street cart style pretzels right at home.

Buttery Soft Pretzels
Makes 12

Ingredients

  • 4 teaspoons active dry yeast
  • 1 teaspoon white sugar
  • 1 1/4 cups warm water (110 degrees F/45 degrees C)
  • 5 cups all-purpose flour
  • 1/2 cup white sugar
  • 1 1/2 teaspoons salt
  • 1 tablespoon vegetable oil
  •  
  • 1/2 cup baking soda
  • 4 cups hot water
  • 1/4 cup kosher salt, for topping

Directions

  1. In a small bowl, dissolve yeast and 1 teaspoon sugar in warm water. Let stand until creamy, about 10 minutes.
  2. In a large bowl, mix together flour, 1/2 cup sugar, and salt. Make a well in the center; add the oil and yeast mixture. Mix and form into a dough. If the mixture is dry, add one or two tablespoons of water. Knead the dough until smooth, about 7 to 8 minutes. Lightly oil a large bowl, place the dough in the bowl and turn to coat with oil. Cover with plastic wrap and let rise in a warm place until doubled in size, about 1 hour.
  3. Preheat oven to 450 degrees F (230 degrees C). In a large bowl, dissolve baking soda in hot water.
  4. When risen, turn dough out onto a lightly floured surface and divide into 12 equal pieces. Roll each piece into a rope and twist into a pretzel shape. Once all of the dough is all shaped, dip each pretzel into the baking soda solution and place on a greased baking sheet. Sprinkle with kosher salt.
  5. Bake in preheated oven for 8 minutes, until browned.


Saturday, September 25, 2010

Muenster Scallion Biscuits


This was my take on an already existing recipe utilizing ingredients I could easily get in my neighborhood supermarket. The recipe was from Smitten Kitchen (I love the recipes there) and it turned out perfect. The biscuits were easy to make and the texture was so tender. The recipe at SK called for blue cheese but I used muenster and I am sure you can you any cheese your heart desires as well. So I followed the SK recipe exactly except for chopping sliced muenster cheese and chopping it to tiny bits. When I took my biscuits out the oven I immediately brushed them with some melted butter, but to save yourself the calories you can definitely leave out that step.


Blue Cheese Scallion Drop Biscuits
2 1/4 cups all-purpose flour
2 1/2 teaspoons baking powder
2 teaspoons sugar
3/4 teaspoon baking soda
1 teaspoon salt
6 tablespoons (3/4 stick or 3 ounces) cold unsalted butter, cut into 1/2-inch cubes
1 1/2 cups crumbled blue cheese
4 scallions, finely chopped
1 cup well-shaken buttermilk (or, you can make your own)

Preheat oven to 450°F. Whisk together flour, baking powder, sugar, baking soda, and salt in a bowl, then blend in butter with your fingertips until mixture resembles coarse meal. Stir in blue cheese and scallions. Add buttermilk and stir until just combined.
Drop dough in 12 equal mounds about 2 inches apart onto a buttered large baking sheet, or one lined with parchment paper. Bake in middle of oven until golden, 16 to 20 minutes.

Sunday, September 12, 2010

Monkey Bread


I have been intrigued  with making monkey bread ever since I saw the movie Beauty Shop with that lady trying to sell her monkey bread to everyone in the salon. I actually didn't know what it was  at the time but I caught my first glimpse at Brown Eyed Baker. I really did not want to use refrigerated dinner rolls from the supermarket so I was elated to see that this recipe was entirely from scratch. I didn't make the recipe the same time I saw it, but one day before school I was feeling for something sweet and I decided to make it since I had all the ingredients on hand. This recipe was pretty much perfect taste wise but I did have to use more cinnamon sugar than indicated because I ran out half way through. The dough was very soft inside and the outside caramelized beautifully.I opted not to use the glaze because I thought it would have made everything overly sweet for my family's taste, but it is nice for presentation.  My family and friends thought it was so good and they devoured the entire thing.


Monkey Bread
Yield: 1 loaf, serving 6 to 8
Total Prep Time: 1 hour | Total Rise Time: 2 hours | Bake Time: 35 minutes
Dough:
4 tablespoons unsalted butter, divided, 2 tablespoons softened and 2 tablespoons melted
1 cup milk, warm (about 110 degrees F)
1/3 cup water, warm (about 110 degrees F)
¼ cup granulated sugar
1 package instant yeast
3¼ cups all-purpose flour, plus extra for work surface
2 teaspoons salt
Brown Sugar Coating:
1 cup light brown sugar
2 teaspoons ground cinnamon
8 tablespoons unsalted butter (1 stick), melted
Glaze:
1 cup confectioners’ sugar
2 tablespoons milk
1. Butter Bundt pan with 2 tablespoons softened butter. Set aside.
2. In a large measuring cup, mix together milk, water, melted butter, sugar and yeast. Mix flour and salt in standing mixer fitted with dough hook. Turn machine to low and slowly add milk mixture. After dough comes together, increase speed to medium and mix until dough is shiny and smooth, 6 to 7 minutes. Turn dough onto lightly floured counter and knead briefly to form smooth, round ball. Coat large bowl with nonstick cooking spray. Place dough in bowl and coat surface of dough with cooking spray. Cover bowl with plastic wrap and place in a draft-free area until dough doubles in size, 50 to 60 minutes.
3. For the sugar coating: While the dough is rising, mix brown sugar and cinnamon together in a bowl. Place melted butter in second bowl. Set aside.
4. To form the bread: Gently remove the dough from the bowl, and pat into a rough 8-inch square. Using a bench scraper or knife, cut dough into 64 pieces.
5. Roll each dough piece into a ball. Working one at a time, dip the balls into the melted butter, allowing excess butter to drip back into the bowl. Roll in the brown sugar mixture, then layer balls in the Bundt pan, staggering seams where dough balls meet as you build layers.
6. Cover the Bundt pan tightly with plastic wrap and place in draft-free area until dough balls are puffy and have risen 1 to 2 inches from top of pan, 50 to 70 minutes.
7. Preheat oven to 350 degrees F. Unwrap the pan and bake until the top is deep brown and caramel begins to bubble around the edges, 30 to 35 minutes. Cool in the pan for 5 minutes, then turn out onto a platter and allow to cool slightly, about 10 minutes.
8. For the glaze: While the bread cools, whisk the confectioners’ sugar and milk in a small bowl until the lumps are gone. Using a whisk, drizzle the glaze over the monkey bread, letting it run over top and down the sides of the bread. Serve warm.
*NoteTo make without a stand mixer: In step 2, mix the flour and salt in a large bowl. Make a well in the flour, then add the milk mixture to the well. Using a wooden spoon, stir until the dough becomes shaggy and is difficult to stir. Turn out the dough onto a lightly floured work surface and begin to knead, incorporating the shaggy scraps back into the dough. Knead until dough is smooth and satiny, about 10 minutes. Shape into a taut ball and proceed as directed.


Wednesday, September 8, 2010

Buttermilk Cornbread


When I think of cornbread I envision a table spread akin to the Soul food movie with fry chicken, yams, collard greens, and the like. I also think of it as a staple of  not only southern cooking but American cooking. I am not new to baking cornbread and I have been putting new spins on boxes of jiffy mixes since I was a little girl adding in cheese, sausage, or extra butter. As time went on I moved away from the Jiffy boxes and started making my own from scratch but the recipes I found never really did it for me. I wanted a dense, semi sweet, semi savory bread. I kept on searching and last week found a recipe on allrecipes.com , it was a buttermilk cornbread recipe with great reviews. The recipe made 9 servings but I wanted 12 so I used to automatic recipe converter. The only strange happenings was that the recipe called for 2 3/4 eggs!? I decided that 3 whole eggs would work and only add to the cake-iness of the cornbread.  I also reduced the converted amount of sugar from over 3/4 cups to only 1/2 because I didn't want it to be too sweet, and lastly I added in one tablespoon each of garlic and onion powder. I wanted to go extra southern and bake the cornbread in a cast iron skillet so I liberally greased it with butter and carried on mixing the batter. The recipe was a great success and even though I am not the biggest fan of cornbread I plan to keep the recipe for whenever I am in the mood for good ol' cornbread.


Grandmother's Buttermilk Cornbread


  • 2/3 cup butter
  • 1/2 cup white sugar
  • 3 eggs
  • 1-1/3 cups buttermilk
  • 3/4 teaspoon baking soda
  • 1-1/3 cups cornmeal
  • 1-1/3 cups all-purpose flour
  • 3/4 teaspoon salt
  • 1 tsp garlic powder
  • 1 tsp onion powder


  • Preheat oven to 375 degrees F (175 degrees C). Grease an 8 inch square pan.


  • Melt butter in large skillet. Remove from heat and stir in sugar. Quickly add eggs and beat until well blended. Combine buttermilk with baking soda and stir into mixture in pan. Stir in cornmeal, flour, garlic powder, onion powder, and salt until well blended and few lumps remain. Pour batter into the prepared pan.


  • Bake in the preheated oven for 30 to 40 minutes, or until a toothpick inserted in the center comes out clean.


    Monday, August 23, 2010

    Rustic Style Pizza


    I don't think I know a new yorker alive who doesn't love a good slice of pizza. I mean this place has got to be the home of the dollar slice. But in recent years I have seen a trend of moving away from the quick plain greasy cheesy slice to the more artistic slice. Everyone seems to be in search of the perfect crust, fresh mozzarella, and more local ingredients.  I'm not really new to pizza making but I never really found a recipe that made me a pizza like those you could get in a great brick oven pizzeria, either the crust was to bread like, or It suggested to many add ons that turned everything into a cheesy mess. I began reading this new blog earlier this month called A Year in Bread and they had a recipe for pizza dough that seemed promising. I checked to see that I had all ingredients and rolled up my sleeved and got to kneading. I had everything I needed to execute this recipe except a baking stone and a pizza wheel. But My mother had a tawa that she bought from Trinidad. Its a large completely flat cast iron disc that is used to prepare roti. I figured it could stand in for a baking stone since it can tolerate high heat levels. When the tawa first went in the 500 degree oven it started to smoke but a couple sprinkles of water seemed to fix that. The recipe also suggested that if you didn't have a pizza wheel that a flat cookie sheet could substitute. Minus those substitutions I followed the recipe exactly. After I shaped my crust I used traditional Ragu sauce, fresh mozzarella from Sahadi's in Brooklyn, a sprinkle of olive oil, and fresh basil from my garden to top the pizzas. When the pizza went into the oven I already knew it would be perfect before I even bit into it. The crust started to bubble up and it just resembled a pizza that I would spend money on at a restaurant. After I took it out the oven and let it rest for about 10 minutes I cut into it and the first slice...pure heaven. Who knew something so simple could taste so good. All that was missing was a good Italian wine. My sister loved it and when my brother got around to trying it he said that it tasted like "brick oven style pizza!", that was the greatest reward.
    The recipe can be found here.

    Tuesday, August 17, 2010

    Guyanese Tennis Rolls


    When I think of tennis rolls I think of Allan's Bakery on nostrand ave in Brooklyn. After all that's where I had my first taste of those sweet buttery rolls. As a little girl my grandparents went every Saturday to buy beef patties, tennis and currants rolls, butter loves, and cake if it was a birthday. From my knowledge tennis rolls are a Guyanese thing and Allan's is a vincentian bakery but recipes get exchanged through inter island migration..I guess that's how Allan's made it their own. Tennis rolls is a very dense bread with a buttery flavor and sweetness from the lemon or orange zest and vanilla that is used. Prior to making this I did not have tennis rolls for a significant amount of years and was really craving some. I decided that making it would be cheaper and more rewarding because being able to make something you previously had to spend money on is a great feeling in my opinion. I did some research around the web and started comparing recipes. I decided to merge and doctor a few recipes I found online, the main recipe is from Guyana Outpost. Here it is:

    Tennis Rolls
    1 pkg. active dry yeast (I used 1tbsp instant yeast)
    ¼ cup warm water, 110°F
    ¼ cup butter or margarine
    1 cup sugar
    1 tsp salt
    1 cup milk, scalded
    2 eggs and 1 egg yolk beaten
    1 egg white
    1 tsp grated lemon rind or orange rind
    2 tsp lemon extract
    1 tsp vanilla extract
    4½ to 5 cups flour (I used 6 cups)
    Preparation
    • Soften the yeast in warm water.
    • Add butter/shortening, sugar, salt, lemon rind, lemon extract and vanilla extract to the scalded milk. Let cool to lukewarm.
    • When cool add yeast, eggs and enough flour to make a batter. Beat well.
    • Add more flour, a little at a time, to make a soft dough. Turn onto a lightly floured surface and knead until satiny.
    • Place in a greased bowl, cover with a damp cloth and let rise until double in size.
    • Punch down, shape into rolls and let rise again.
    • Brush with egg white mixed with water and bake at 375°F for 25 to 30 min. Makes about 10 large rolls.

    Trinidad Hops Bread


    Trinidad hops bread is a light airy bread that is sold in the form of rolls in the twin isle republic. Im not exactly sure why they call it hops bread but I have heard it is because originally the bread was made with hops instead of yeast. In the island republic Hops bread is shipped out to all markets very early in the morning every morning or they can be picked up from bakeries. The bread in my opinion has a neutral taste that allows it to accompany so many different fillings, Im partial to butter and cheese. My first memory of hops bread is in my Grandmothers house in Trinidad. I was somewhere around the age of 5 and I remember sitting in her kitchen, hearing chickens clucking, birds tweeting, and the gas man passing shouting out for people to buy new tanks of gas for their kitchens. As I sat by the table my Grandmother Justina placed the plate of  scrambled eggs fresh from the coup, sausage, and a warm sliced hops roll...Everything was so good and fresh, talk about good eats!
    Fast forward about 20 years and I am here making hops bread in my kitchen in Brooklyn when Im feeling for a taste of that place my mother affectionately refers to as "home". While in Trinidad for a 6 month stay in 2004 I picked up the revised copy of Naparima Girls Cookbook and I have been using their recipe ever since. I have tweaked the recipe to my liking because I find the amount of shortening in the recipe is too minuscule.

    Trinidad Hops Bread

    2 1/2 cups hot water
    1 tbsp shortening ( I use 4)
    8 cups all purpose flour
    2tsp salt
    2tsp granulated sugar
    1 pack or 1 tbsp instant yeast

    1. Stir hot water and shortening together until  the fat melts and the liquid is lukewarm.
    2. Place 6 cups flour, salt, sugar, and yeast in a large bowl and combine. 
    3. Add liquid gradually to flour and mix well
    4. Place on floured surface and knead for 5 minutes adding remaining flour to make a moderately stiff dough.
    5. Place in greased bowl, cover and let rise until doubled (about 30-45 minutes).
    6. Punch down dough and form into balls 3in in diameter.
    7. Place on greased baking tray, cover with a damp cloth and allow to rise until doubled.
    8. Bake in a preheated oven at 400 degrees for 15-20 minutes.