Sunday, November 28, 2010

Lemon Pappardelle and pan seared snapper.


I go to school downtown Brooklyn not far from the only trader joes for the borough. Its not uncommon for me to take a cool walk down court street to visit my favorite markets...Sahadi's, A Cooks Companion, and Trader Joes. When I visited Trader Joes a couple weeks ago I picked up their lemon pepper pappardelle pasta to try out. The day that I thought of cooking it I had no idea how to prepare it but the packaging said its so flavorful that it just needed a little olive oil and salt so I decided to work around that. I chopped up some shallots, garlic and fresh herbs from my garden such as basil, parsley, and oregano and placed them to the side. After I put the pasta to boil I strained it and ran it under some cold water to shock it and placed it to the side as well. I also had some fish defrosting that was seasoned with green seasoning so I planned to let that accompany my pasta. I wasn't entirely sure how this would all come out but I was just hoping for a yummy filling meal.  I heated my saute pan and made all my herbs and aromatics sizzle and tossed in the pasta with some olive oil and Voila!!...the pasta was a palatable success! The fish I decided to keep simple and sear in grapeseed oil and that was another success. Lunch was ready in about a half hour and my tummy was thankful. If your ever in trader joes check out that lemon pappardelle in the pasta aisle and I can promise that you wont be disappointed.

Lemon Pepper Pappardelle with Pan Seared Snapper

Half package of pappardelle, about 4oz, boiled and shocked
1 shallot, small diced
4 cloves garlic, small diced
3 Tbsp olive oil
1 tsp fresh basil, chopped
1tsp fresh parsley, chopped
1/2 tsp oregano, chopped
2 pieces snapper, steak cut
2 tbsp green seasoning, fresh or store bought
1 1/2 tbsp grapseed oil
salt and pepper to taste

- Place large saute pan under medium/high heat, add 1tbsp of olive oil 
- When oil is hot but not smoking add in garlic and shallots and saute until clear
- Add in pasta to garlic and shallots, toss for 1 minute
- Add in fresh herbs and remaining olive oil and cook until hot.
- Add salt and pepper to taste, cover and set aside
- In a next saute pan under medium/high heat add in grapeseed oil. 
- Rub in green seasoning to fish steaks
- By this time oil should be extremely hot so proceed to add steaks to the pan carefully to avoid getting burned.
- Leave steaks to brown on one side about 2-3 minutes then flip them and let the other side brown for the same time.
- Turn off heat from under fish.
- Serve immediately

Pot Bread

The inside of the second loaf.


Have you all ever heard of pot bread? I know I hadn't until I was perusing through one of my favorite blogs and happened upon the recipe. I'm a visual person and just by the looks of the bread in the photo I decided that It was a must try, it was also a great way to use the Rachel Ray cast iron casserole dish that was begging to come off the kitchen bench. I made this recipe twice trying out the different fermenting times that were suggested. This recipe said that the dough would need to ferment between 12 to 18 hours  and then after a final addition of butter it would need to sit for another 2 hours or so. I decided to follow the exact measurements (outside of letting my bread sit in a about 1/2 cup olive oil while it fermented) and use a 12 hour fermenting period the first time and see what my results would be. The bread from the first batch was absolutely wonderful. The crust was crispy and buttery and the inside was just a chewy goodness. The bread was so flavorful that it didn't need any butter or cheese in my opinion. I gave my first batch 2 thumbs up! I have a pretty large oval cast iron pot to put the bread in but it did not fill the pot enough to give me the height I would like my loaves to have, so for my second try I decided to do one and a half times the recipe and I also let it sit for the full 18 hours. When I checked the bread in the morning to mix in the butter it was bubbling like swamp thing but it smelled fine. After it rose a second time and the dough was placed in the oven I noticed the scent of great bread still filled the house so I assumed everything was fine. When I took the bread out it had the same wonderful crust and color but after my first taste I realized that my dough was reminiscent of sourdough. I am a fan of sourdough but that s not what I was going for and it was a hit or miss amongst the family whereas the first one was a absolute hit. I would recommend letting this dough sit only for 12 hours and I would like to tell everyone that I didn't use all purpose flour but bread flour. When making breads where you want to achieve a chewy texture bread flour/high gluten flour is the way to go.
The first loaf

The inside of the first loaf.

The outside of the second loaf.


No-Knead White Bread (bakingbites.com)


4 cups all purpose flour
2 tbsp sugar
2 tsp salt
3/4 tsp instant yeast
1 3⁄4 cups + 2 tbsp ice water
2 tbsp butter, melted and cooled
In a large bowl, stir together flour, sugar, salt, yeast and ice water until well combined. Dough should be thick and slightly sticky. Add a few tablespoons more flour if dough is too soft; add a bit more water if it is too dry and the flour is not incorporating well. Brush top of dough with some vegetable oil to prevent sticking, then cover with plastic wrap and let stand at room temperature for 12-18 hours.
Pour melted butter into risen dough and stir vigorously, until well incorporated. Cover bowl again and let dough rise for 2 – 2 1/2 hours.
Preheat oven to 450F. Place a dutch oven inside for about 20 minutes, until both it and the oven are hot.
Remove dutch oven from oven and, working carefully, pour bread dough into the dutch oven, trying to deflate it as little as possible. Sprinkle with water and put the lid on the oven.
Lower oven temperature to 425F. Bake bread for 50 minutes with the lid on. Check the bread to see if it is browning. If not, remove the lid at this point. Bake for an additional 20 minutes. Check the bread with an instant-read thermometer and when it has reached about 207F it is done.
Turn bread out onto a wire rack to cool before slicing.
Makes 1 large loaf

Saltfish Buljol


Saltfish buljol is one of those dishes that I have come to love after I gave up meat. I have always had it in some form throughout my life but mostly in the form of fishcakes or accra's. From the stories I heard growing up Saltfish, smoked herring, and other smoked or salted forms of meat and fish were perceived to be food for the poor. They were considered so because they were relatively cheap and able to be stored outside of an icebox. I guess this would be similar to traditional black southern foods like chitterlings and collard greens which were entrails and weeds given to the slaves to eat.  I am no historian so I cannot say this is the absolute truth but it doesn't seem far fetched at all but either way to me I find it extremely tasty. Every household has their own method for making saltfish some people boil it some soak it, some serve it with rice, some like it with ground provision but anyway you get some it shouldn't be anything less than satisfying. I like to boil my saltfish twice to remove the majority of the salt but not too much that I need to add salt in the final cooking, and then I like to cook it with lots of onion, garlic, some carrot, and fresh tomatoes. In my home I serve my saltfish with anything from fry bake to pasta...to me its all good. Depending on the area you live satfish or salted cod can be bought in an Asian market or the Caribbean/Latin section of your supermarket. Before I go I want to leave you with one last tip for frying up your saltfish...if you have any leftover oil from frying fish its a great way to get the most out of your oil and it adds some extra fishy flavor to your saltfish and when you serve it everyone will be saying "how yuh hand sweet so!!" Enjoy!


Saltfish Buljol

1lb Salted cod
1 medium onion, diced
4 cloves of garlic, diced
1 small carrot, diced
1 small hot pepper(I used a habenero)
4 Tbsp oil
1 medium tomato, diced
- Boil saltfish to remove enough salt until its your taste
- when saltfish is ready, drain, and set aside.
- Put a large saucepan on the stove with oil under medium to high heat.
- when the oil is hot place onion, garlic, carrot, and hot pepper in the pot, saute for 2 minutes.
- Add in saltfish to the pot and saute for 5 minutes
- After 5 minutes add in tomato's and saute for 1-2 minutes more, turn off the stove and add salt or more pepper to taste. 
- Serve with rice, fried bake, or ground provision

Saturday, November 27, 2010

Mail Order Petit Fours

Christmas is right around the corner and I have started planning my Christmas menu. I usually make everything from scratch but one thing that is a tradition is ordering petit fours for the holidays. I remember being a little girl and waiting for that big box full of goodies to arrive right before the big day. My mom and grandma usually ordered from Figi's catalog and along with the petit fours we would get cheese, candies, and sausages. My palette was in holiday bliss after consuming so many yummy treats. My late teens through early twenties we didn't order them but a few years ago I missed the tradition of petit fours and while planning the menu for a Holiday party we threw at home I remembered those little squares of frosted goodness and decided to order them. Now for someone used to exceptional pastries you may be wondering why I insist on ordering these pre-baked figi petit fours...well it is because they flood my mind with nostalgia. Christmases from my childhood were wonderful occasions filled with family, warmth, laughter, and togetherness. People that know me know that I love to relive the good times from my childhood so these treats were like a time machine of sorts. The petit fours from Figi's were good definitely not great. My favorite were the vanilla frosted ones but some of the chocolate ones were on the dry side. This year for my Christmas dinner I would like to order petit fours    again but I am weighing my options. Who to order from, Figi's catalogue, Swiss Colony, 1-800-bakery.com, Williams Sonoma, etc? There are many options on different price scales but I would like to get a decent quality and quantity for a reasonable price. I haven't had a major problem with Figi's but I need an option for their petit fours where I can get ore vanilla cakes opposed to chocolate. I am considering Swiss colony because of the amount you are getting for the price but the reviews I read online seemed mixed. In short there are so many options but whichever one I order I will definitely post a review to let you all know.

Monday, November 22, 2010

Snickerdoodle Blondies

This time around I was going to make something my mom could enjoy...no cocoa filled brownies this week since mom doesn't like chocolate. I decide to check out one of my favorite blogs bakingbites.com to see if I could find something. I saw she had a snickerdoodle brownie recipe and I thought to myself that should work. My mom loves the snickerdoodle cookies I make so I was hoping she would love these just as much. Since the recipes here are pretty much no fail I didn't have any doubts about wasting ingredients. This recipe is just to easy and would recommend for anyone from a novice baker to an accomplished chef who just wants some comforting spicy goodness. The recipe has a great texture, thick and chewy like a brownie I loved it and so did the family. I would like to try making this recipe with real Ceylon cinnamon instead of the widely available cassia kind and taste the difference.  I totally recommend this to my readers, just bake a batch of these up quickly and enjoy with a nice cup of tea during the cooler months.


Snickerdoodle Blondies
1/2 cup butter
1 cup sugar
1/4 tsp salt
1 large egg
1 1/2 tsp vanilla extract
1 cup all purpose flour
1 tbsp sugar + 1 tsp ground cinnamon
Preheat oven to 350F. Line an 8×8-inch baking pan with aluminum foil.
In a large bowl, cream together butter and sugar until light. Beat in salt, egg and vanilla extract until well combined. Add in flour and stir until no streaks of dry ingredients remain. Pour dough – it will be thick – into prepared baking dish and smooth it into an even layer.
Stir together remaining 1 tbsp sugar and 1 tsp ground cinnamon. Sprinkle dough evenly with cinnamon sugar mixture.
Bake for about 30 minutes, until bars are set and the edges are just very lightly browned. Cool in the pan before slicing.
Makes 16.

Saturday, November 20, 2010

Cookie Brownies


This is actually a take on my favorite brownie recipe from Baking Bite. I think this recipe is actually on her blog but I didn't look for it so I just decided to try to make it on my own. It doesn't take anything extra except some sandwich cookies broken up into pieces such as Oreos, Newman's Own, or Joe Joe's.
I used candy cane Joe Joe's from Trader Joe's which contain little pieces of candy canes. While I had the brownie mix preparing on the stove I began crushing the cookies by hand in a separate bowl. When the batter was finished I just mixed in the cookies...baking time. I hoped that everyone would like this deviation since  normally don't mix in anything to my brownies but I said they all love Joe Joe's so it should be a hit. After they cooled and were cut I bit into them and you could definitely taste the mint and the cookies added a slightly crunchier texture to the brownies. I wasn't a big fan of them but my family gobbled up the DOUBLE BATCH in two days! I guess that facts speaks for them more than I ever could.


Peppermint Cookie Brownies
1 cup unsalted butter
8oz unsweetened chocolate
2 1/2 cups sugar
3tsp vanilla
1/2 tsp salt
4 eggs
1 cup flour
1 1/2 cup crushed cookies

- Preheat oven to 400 and line a 17in brownie pan with foil or parchment paper
- melt butter and chocolate in sauce pot
- whisk in sugar, salt, and vanilla
- whisk in eggs one at a time
- whisk in flour
- add in crushed cookies
- pour batter into prepared pan and bake for 20 minutes 
- while brownies are in the oven prepare a ice bath to put pan in to instantly cool brownies.
- when brownies cool, cut and store.

Punche Creme


December automatically means we are getting into the holiday spirit all around the world. My family celebrates Christmas and not just any Christmas but a Trini Style Christmas. That means sorrel, pastelles, black cake, homemade wine, ginger beer,  massive amounts of food, and punche creme. I never spent an actually Christmas in Trinidad but I always spent Christmas with my Caribbean family in NY.  I don't think I missed too much not being in Trinidad because ex patriots have a way of hanging on to traditions with a tight grip. Growing up my Christmas was always a Caribbean mix of traditions from Barbados and Trinidad. As a kid I was a picky eater and more focused on my new toys than sampling the array of goodies at the table. Now that I'm older I truly appreciate the rich  traditions of a Caribbean Christmas which focuses and food, drinks, and the warmth that close friends and family brings. Now back to the drink...I don't like punche creme personally since I don't like milk based drinks but its a staple in any Trinidadian house during the holidays. This famous concoction is  sometimes called ponche de creme or punch de creme. Most recipes call for eggs but my mom doesn't fancy that and uses coconut milk instead which makes for a drink where you don't have to worry about icky pieces chalazae (what trini people call the eye) in your cup or ecoli. When making punche creme most people I know sterilize old glass bottles such as those from wine but you can use a Rubbermaid pitcher. Also ideally punche creme should be made at least a day ahead and left to sit so the flavors can really combine, I promise you wouldn't be disappointed if you use this method. Also punche creme can be made virgin but you definitely don't get the same effect and it will definitely have to be refrigerated.  To go the no fail traditional route use rum such as Bacardi which is widely available. I am happy to be sending this recipe from my table to yours and it would be a great addition to any holiday table so I hope you enjoy.

Punche Creme
- 1 13.5oz can of coconut milk
- 2 14oz can of condensed milk
- 2 14oz cans of evaporated milk
- rind of one lime
- 1/4 tsp nutmeg
- 2 dash of angostura bitters
- 2 tbsp vanilla extract
- 2 cups of your favorite rum


- Combine all of the milk together
- Grate rind of lime and add to mixture
- Add rum to mixture and mix vigorously with a whisk or swizzle stick.
- Strain lime out of the milk
- Add bitters, vanilla,  and nutmeg
 - pour into clean glass bottles or covered pitcher.


Tuesday, November 9, 2010

Soft Pretzel Rolls


I know I know...I have been away for some time but its almost the end of the semester so its crunch time. But I do have a treat for you..some yummy soft pretzel rolls topped with sesame seeds and poppy seeds. I wanted to do a pretzel recipe for some time and when I saw this recipe on Allrecipes.com I decided I would try it. The recipe calls for all purpose flour but I used bread flour since its high gluten content would give me the chewiness I look for in pretzels. When going through my ingredients I noticed I ran out of kosher salt so substitutions were in order...to top my pretzels I sprinkled some table salt and topped them with sesame seeds and poppy seeds. The pretzels proved easy to make up until it was time to shape them...I have a silpat-esque mat so that was helpful to roll them out but I couldn't really get the hang of shaping them. When I put my pretzels in the baking soda bath they took on another shape and that's how I ended up with twist instead of traditional pretzels...not a problem all yummy nonetheless. The texture and taste of these pretzels were divine. Slight crunch on the outside and chewy buttery goodness on the inside. I already planned to modify this recipe into rolls for Christmas. I hope that you all decide to give this recipe a try and get a taste of NY street cart style pretzels right at home.

Buttery Soft Pretzels
Makes 12

Ingredients

  • 4 teaspoons active dry yeast
  • 1 teaspoon white sugar
  • 1 1/4 cups warm water (110 degrees F/45 degrees C)
  • 5 cups all-purpose flour
  • 1/2 cup white sugar
  • 1 1/2 teaspoons salt
  • 1 tablespoon vegetable oil
  •  
  • 1/2 cup baking soda
  • 4 cups hot water
  • 1/4 cup kosher salt, for topping

Directions

  1. In a small bowl, dissolve yeast and 1 teaspoon sugar in warm water. Let stand until creamy, about 10 minutes.
  2. In a large bowl, mix together flour, 1/2 cup sugar, and salt. Make a well in the center; add the oil and yeast mixture. Mix and form into a dough. If the mixture is dry, add one or two tablespoons of water. Knead the dough until smooth, about 7 to 8 minutes. Lightly oil a large bowl, place the dough in the bowl and turn to coat with oil. Cover with plastic wrap and let rise in a warm place until doubled in size, about 1 hour.
  3. Preheat oven to 450 degrees F (230 degrees C). In a large bowl, dissolve baking soda in hot water.
  4. When risen, turn dough out onto a lightly floured surface and divide into 12 equal pieces. Roll each piece into a rope and twist into a pretzel shape. Once all of the dough is all shaped, dip each pretzel into the baking soda solution and place on a greased baking sheet. Sprinkle with kosher salt.
  5. Bake in preheated oven for 8 minutes, until browned.


Monday, October 25, 2010

English Roast Potatoes

Growing up I always loved family dinners on Sundays. In my Granny's house there was always an abundance of food, a mix of Caribbean, English, and American. One of my favorite side dishes from Sunday "lunch" as Caribbean people say was English roast potatoes. My aunt used to prepare it and she always had me help her with the preparations. I'm not sure how my aunt came into making this recipe but it more than likely has something to do with her having family in England. Back to the good stuff...when they came out the oven,those little quarters of potatoes bronzed and glistening I couldn't help but sneak a couple before dinner..they were soooo yummy! Today I'm all grown up but still love making these little roasted gems and yes I still sneak a few as soon as they come out the oven.

* this recipe makes alot so cut down if you don't have a large amount to feed.

English Roast Potatoes
5lb bag of red potatoes, quartered and boil till fork tender
1 packet of onion soup mix
1/2 cup olive oil
black pepper to taste

- Heat oven at 400 degrees
- When your potatoes finish boiling, strain them and add into a large bowl
- Pour olive oil over potatoes along with soup mix and black pepper, toss
- Spread on sheet pan and baked until golden about 45 minutes

This is before it bakes

This is how it looks on a dinner plate

Sunday, October 24, 2010

Yogi Skin Detox Tea


It finally that time year where blustery winds have began to blow and the air is much drier, all of this can take a toll on skin and leave it looking dull. I go through this problem every year...my skin is typically oily but around this time it gets very thirsty for moisture and craves the sun to give it that bronzeish glow. I usually resort to sticking with my bronzing powder or a glitter cream to add a little sparkle to my skin tone. Around two weeks ago while walking through Whole Foods I went over to the tea section to see what they had on sale for the week and they actually had my favorite yogi brand of tea 2 for $7 so I bought four boxes and one of them was the skin detox. I am not one to believe that a tea can do much for ones appearance without a healthy diet and exercise regimen but this one made me a believer. I drank the tea as my main liquid along with plain water for about a week and a half and numerous people noted the change in my skins appearance.  Everyone asked if I just came back from the Caribbean or just noted that my skin was glowing. Amazon list the product description as:

"Our skin reflects our diet and lifestyle choices: it's the mirror to internal health. It's just as essential to cleanse from the inside; by reducing internal impurities, you can have clearer, glowing skin. Skin DeTox, a new cosmeceutical tea from Yogi, is specially blended to support a healthy skin care regimen. This special formula combines antioxidant-rich organic green tea, a popular ingredient in topical skin care products, with the time-honored detoxifying herbs used in our other detox teas, including yellow dock, burdock root and dandelion root. Oregon grape root, a powerful detoxifying herb used by herbalists for various skin conditions, helps give the skin a truly healthy boost. Includes fragrant rose petal and hibiscus, used in Ayurveda to cool and soothe the skin, entice the senses with a fresh, floral scent and lend a refreshing, intriguing flavor. Discover beauty from within in a deliciously cleansing brew of Skin DeTox!"
I definitely do not regret using this tea and I encourage you to try it as well..winter is coming and we could all use a little sun even if it comes in the form of a tea bag.


Wednesday, October 13, 2010

Hudson Terrace Wine Tasting


Wine seems to be moving up with Americans as the drink of choice and I couldn't be happier. I am not a self professed wine snob but I do consider myself a oenophile. I wasn't always a wine drinker, but for my degree I am required to take at least one wine class. The intro wine class is what started my love affair with wine. For those who don't drink wine I must tell you that wine has its own culture, something that I find so intriguing. There is a proper way to drink which includes a specific glass, and if your a snob a certain way of holding your glass. Wine requires all your senses to truly enjoy. I loved wine so much  that I took the advance glass as well, and no I cannot name every wine region off the top of my head or the grape varieties but I just enjoyed the experience.  On to Hudson Terrace...so I finished my last wine class in the spring of this year but in an effort to keep up with wine culture I wanted to begin attending tastings. I didn't want to go to the tasting I saw on TV that looked like a room full of old snobby people sipping and spitting, but something more relaxed and fun. The answer to my problem came in the form of an email in May from Lifebooker.com. The email was advertising $12 tickets for an informal tasting at Hudson Terrace, and from the details of the email and the reviews online it seemed like a hip, young, and trendy place to "get your wine on".  I bought three tickets so that I could take my sister and a friend with me. So your probably saying "you bought these tiks since June..why are you now writing about it????" Well...this summer just seemed to fly by and I couldn't get to Hudson Terrace until just before the tickets expired. A few weeks ago  my sister, my friend Simone, and myself made our way out to the wine tasting. The first thing I want to say is that you must go if you have a chance this place is beautiful. Hudson Terrace is a rooftop bar located on West 46th Street and Westside Highway. When I arrived there was no line so I walked right in and was greeted by the staff. There is a list with all reservations where your name has to be checked off to go into the wine tasting. After we checked in the girls and I made our way upstairs. Thankfully we were on the early side so I was able to fully scope the place before the crowd rolled in. I love the decor that makes it look like a rooftop getaway and the fact there is a separate bars for wine and for other beverages. Every wine tasting features six wines and you can choose what you want to drink so you are definitely not obligated to drink in a certain order or even drink every wine. The bartenders also give you a significant amount of wine to drink (no skimping here!) and best of all no spitting buckets! The music added to the great summer afternoon ambiance, the DJ played popular American dance music and the volume wasn't overbearing so that you couldn't talk to people. My only gripe is that there needs to be more unreserved seating. Most booths were reserved for people buying bottles that start at upwards of $300, and the remaining booths were taken early so most people had to have your eagle eye out for a place to sit. Other than the seating issue my company and I had a great time at the wine tasting and would love to attend another one.  If you are in NY it would be a great after work event to check out and Lifebooker.com and other discount sites usually have half price deals on tickets.

Friday, October 8, 2010

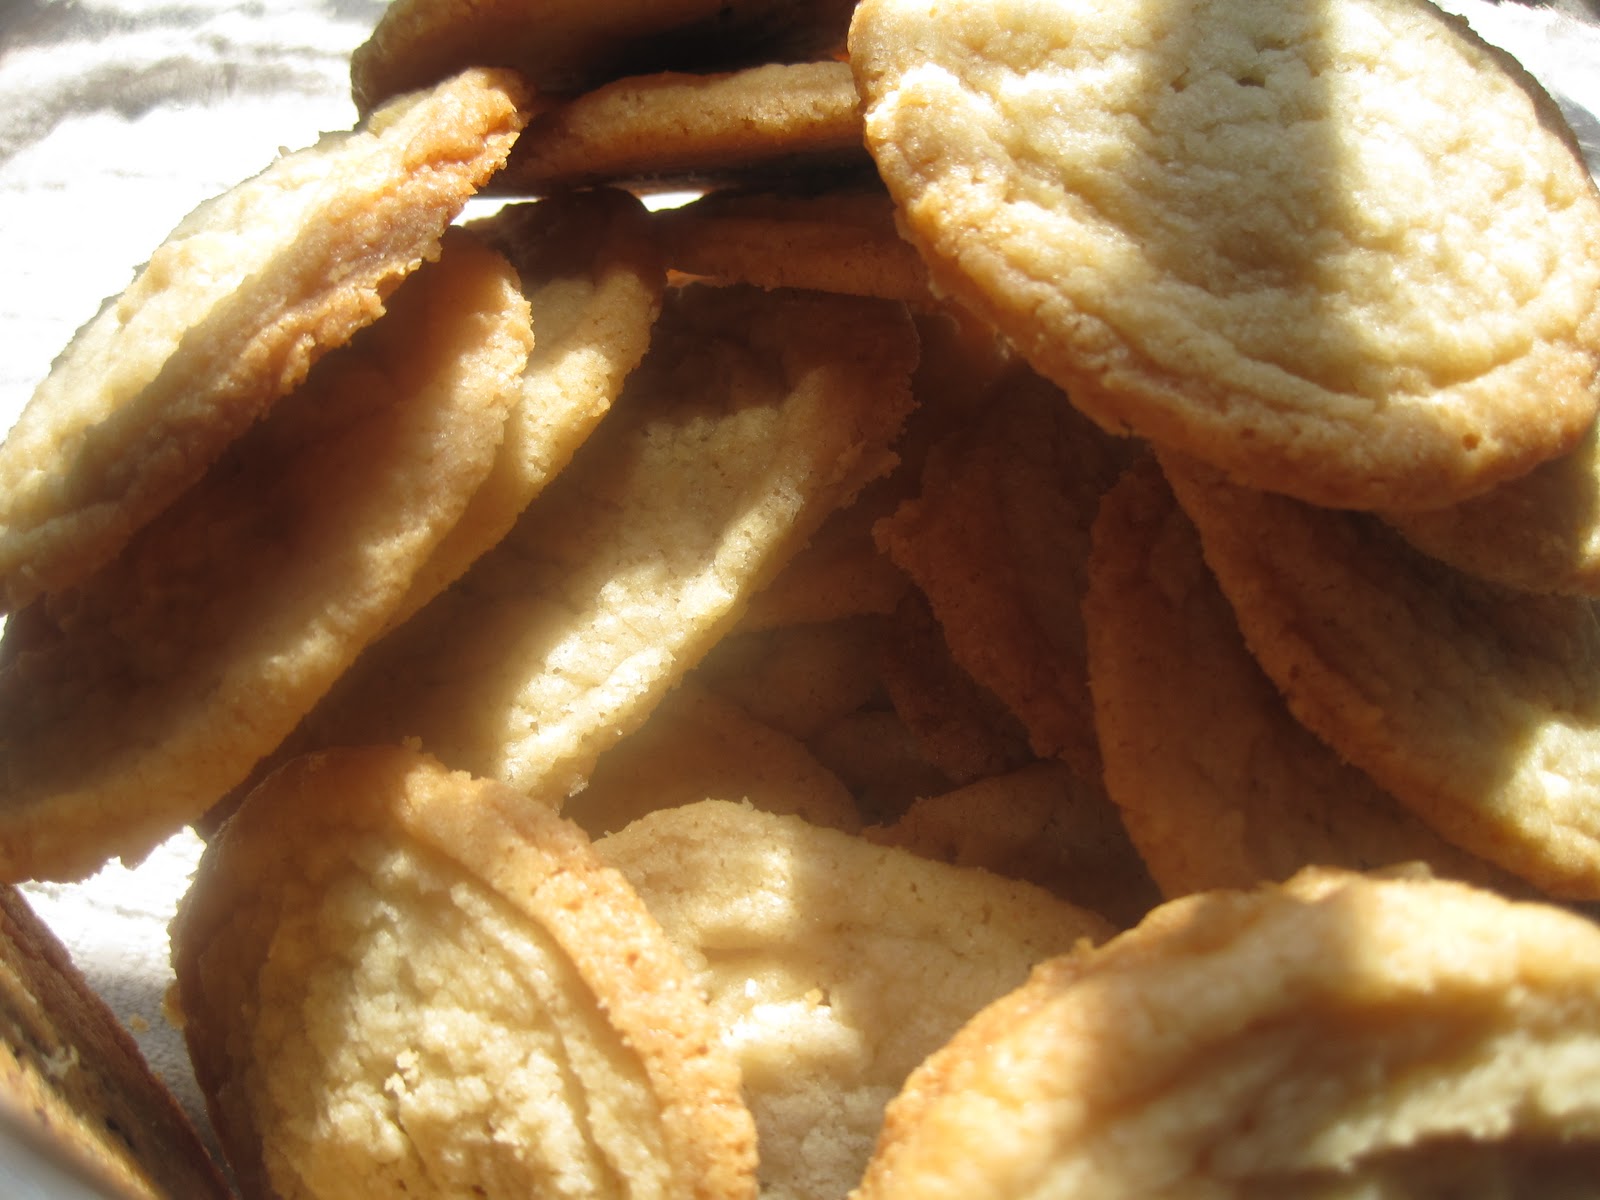
Chocolate Surprise Shortbread Cookies


Since I could not think of anything more creative to name the cookies  will stick with chocolate surprise. This is a take on my favorite shortbread cookie, but with the alterations it comes in as a cross between a sugar cookie and butter cookie without all the extra ingredients such as eggs, baking soda, etc. The cookies came about from hours and endless calories of experimentation. These cookies are too yummy for words, they just melt in your mouth and the chocolate is truly a welcomed surprise and if your a coffee drinker I recommend that you sit down with a few and your favorite cup of espresso.

Chocolate Surprise Shortbread Cookies
1lb unsalted butter
1 cup granulated sugar
1/2 cup brown sugar
1tsp vanilla
4 cups flour
4oz Ghirardelli semi sweet baking bar

1. Combine sugar and butter in mixer until fluffy, add in vanilla and beat for one more minute
2. add in flour and mix on medium low until combined.
3. Using a cookie scoop or your hand, scoop half of the dough you need for one cookie, add a piece of chocolate to the center then cover with some more dough to finish the cookie.
4. Continue shaping out all your cookies and lay them on a sheet pan to chill in the fridge for 15 minutes.
5. While the cookies are in the fridge preheat your oven to 350 degrees and prepare your baking pan. (if you have a large enough fridge you can lay you cookie balls to chill on the sheet you will bake it on)
6. After 15 minutes have passed remove your cookies from the fridge and bake in the oven until cookies are browned on the edges, about 15 minutes.
7. remove pan from oven but don't remove cookies right away, allow cookies to sit for about a minute to firm up and then remove with a spatula. 
8. Cool cookies on a rack and then move to cookie jar or container.