Thursday, June 30, 2011

Hello Yellow: Lemon White Chocolate Cupcakes


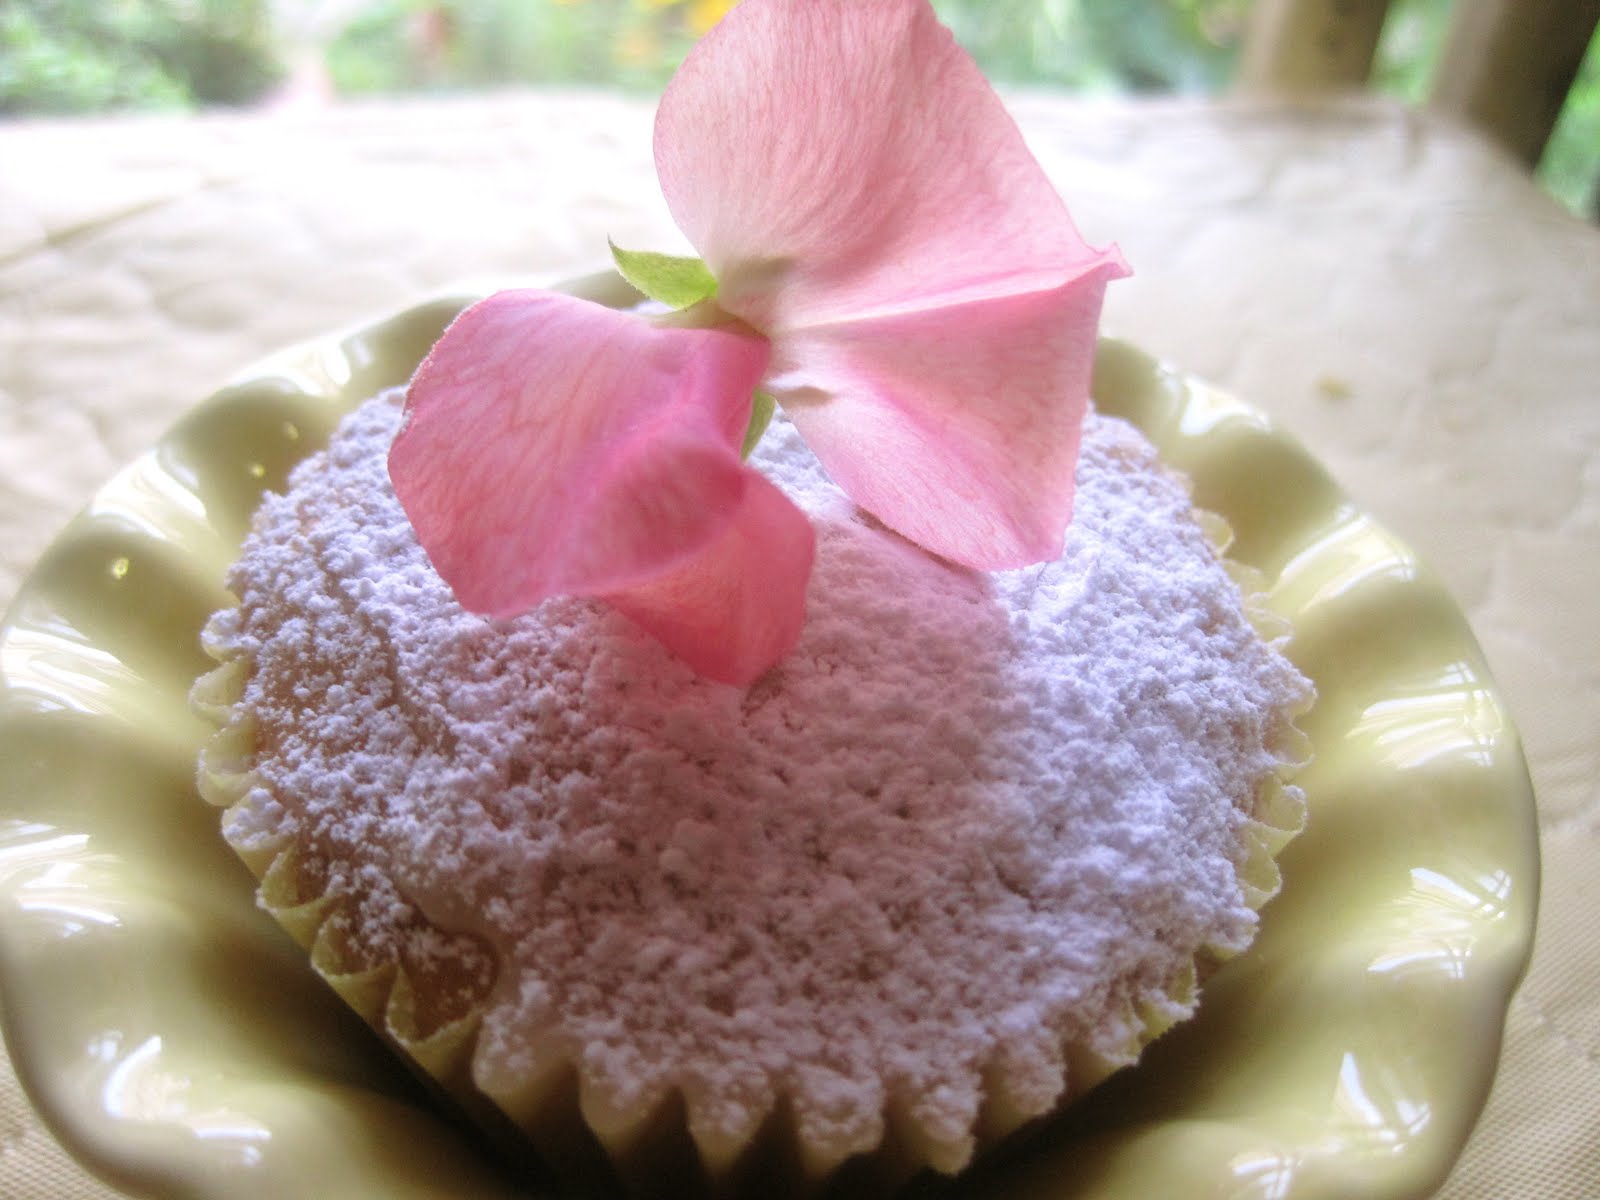
Yellow is one of those colors that just scream summer. I means whats yellow? The sun, lemons, sunflowers, corn roasting on the grill, pineapple italian ices...I could go on forever but that would lead to my brain into a food frenzy and leave me drooling on myself like Homer Simpson. Oh yea...back to the lemons. So the focus of this post is on the buttery, sweet, lemony, white chocolate goodness that I baked yesterday afternoon. The recipe was adapted from One Perfect Bite and tweaked to reflect what I had in stock. The recipe calls for key limes but I used lemons instead since white chocolate and lemons go well together. This recipe was originally baked in a large 9x13inch pan but I opted to try it in a cupcake version.    I really liked this cake because personally I like dense moist cakes so I can definitely add this recipe to my favorites list. I also like this as a cute tea party cake; its not cloyingly sweet and there isn't any fussy frosting to deal with. I will try this recipe again in the original key lime form and compare. In the mean time I'll post my version for you all to enjoy. Also because I believe in shameless plugs...dont forget to order delicious treats for yourself or your next get together from Pink Room Caterers. Contact us at pinkroomcaterering@gmail.com

Lemon White Chocolate Cupcakes

1 3/4 cups all purpose flour
2 tsp baking powder
1/2 tsp salt
1/2 cup unsalted butter
1 cup granulated sugar
2 large eggs, slightly beaten
1 1/2 tsp lemon zest
1 tsp fresh lemon juice
2/3 cup buttermilk
1 cup white chocolate chips

Lemon Glaze
1 cup powdered sugar
3 tbsp fresh lemon juice

- Preheat oven to 350 degrees and line a muffin tin with 16 cupcake liners. Set to the side.
- Mix together flour, baking powder, and salt in large bowl and set to the side.
- In separate mixing bowl (I used my kitchenaid) cream butter and sugar until fluffy. 
- Add in eggs, lemon zest, and lemon juice and mix until well blended.
- With mixer on low begin adding in flour mix and buttermilk alternately until combined.
- Finally stir in white chocolate by hand.
- Divide batter equally amongst cupcake liners and place in oven.
- Bake 35-40 minutes.
- While cupcakes are in the oven begin making the lemon glaze by stirring together the powdered sugar and lemon juice.
- After removing the cupcakes from the oven spread glaze evenly on top of all cupcakes.
- Sprinkle cupcakes with additional powdered sugar if desired. 
- Enjoy

Wednesday, June 29, 2011

Snickerdoodle Cookie Bars

Soft like a pillow!

Cooking and baking really is constant exploration; you can never stop learning or finding a better way to do things. My family loves the cinnamon-y sugary goodness that is a snickerdoodle. Whether its in cookie form or bar form its all good. I have my own go to recipe for snickerdoodle bars but like I mentioned before I'm always looking to see if I can improve on what I already had. I found a recipe for snickerdoodle cookie bars at Frugal Antics of a Harried Homemaker. I fell in love with the picture of the cookie bars, I thought the bars looked chewy just like how I love my cookie bars so I was up for the challenge of making them. I gathered my ingredients and got to work. The recipe uses sour cream which I'm not used to putting in my bars but I heard that it adds moisture to your baked goods. The recipe also didn't call for vanilla or any extract for that matter so I decided to add a teaspoon for flavor. I followed the recipe exact otherwise and baked for the suggested time of 30 minutes. After allowing the recipe to cool for a while I cut into the bars for a taste. I cant say I wasn't disappointed...it just wasn't what I was accustomed too. The texture was cake-y and the flavor had a over bearing egg presence. I also ignored the suggestion of using shortening and opted for all butter...HOW CAN ANYTHING WITH ALL BUTTER GO WRONG???? Well all wasn't lost, instead of a cookie bar I had a snack/tea cake.
 So this recipe just didn't do it for me although my girlfriend thought it tasted good. My mom told me to leave it overnight and taste it the next day to see if the flavor develops further.
I think if you're looking for a cinnamon sugar snack cake that would be perfect with tea then this recipe is for you.

Snickerdoodle Cookie Bar
makes 12 bars

1 cup butter or shortening
1 1/2 cups granulated sugar
3 large eggs
1/4 cup sour cream
2 cups flour
1 tsp baking soda
1 tsp cream of tarter
1 tsp baking powder
1/2 tsp salt
1/3 cup granulated sugar
1 tbsp cinnamon

- Heat oven to 350 degrees and prepare a 9x13in bar pan.
- Combine flour, baking soda, cream of tartar, baking powder, and salt in separate bowl. Set to the side.
- In stand mixer combine butter/shortening and 1 1/2 cup sugar, mix with paddle until fluffy.
- Add eggs one at a time, scaping the bowl in between additions. 
- Add in sour cream.
- Add in dry ingredients and mix just until no streaks of flour remain. 
- Mix cinnamon and 1/3 cup sugar together. 
- Sprinkle the bottom of the prepared pan with some of the cinnamon sugar mixture, reserve the rest for the top.
- Pour the batter into the pan and spread it around evenly. 
- Sprinkle the remaining cinnamon sugar on top.
- Place pan in the oven and bake for 30 minutes.
- Remove and cool. Cut and enjoy!                

Tuesday, June 28, 2011

Fourth of July M&M Cookie Cups


I'm all for simple, cute, yumminess and I found all of that in this recipe. The original recipe called to bake the batter as a bar recipe but I just felt the need to deviate. I thought it would be easier to bake the recipe in cups as it increases it's portability, there is less clean up, and no need to cut perfect serving squares. I also found this recipe was very easy to put together...one pot in fact. It reminded me of my brownie recipe in  that you just whisk everything right in one pot. I did make some changes to the original recipe outside of baking them in cups; since the author said her bars were too sweet I switched out most of the granulated sugar for light brown sugar, I also melted and mixed everything in the same pot, increased the vanilla, and finally I only used certain color M&M's to go with the theme of the holiday which is red and blue...wish I had some white though..oh well. I bought my M&M's from the corner store and the packs they carry don't have white but if you want to make this extra special you can get white color M&M's (or any color for that matter) from M&M's World stores in New York, Orlando, or Las Vegas. If those locations aren't close to you you can order online from My M&M's. As for the fourth of july themed cupcake cups they were at Target for just a $1! This recipe should take no more than 45 to make including a couple minutes to cool. I also want to say this recipe can be made for any occasion by just switching the color M&M's you use. I cant stress how perfect these are for your pool party, beach day, or barbecue! Enjoy making these and happy fourth from the Cupcake Criminal and family!

Good to the last bite!!!
M&M Cookie Cups
Adapted from Stephaniecooks.blogspot.com

1/2 cup unsalted butter
1/2 cup light brown sugar
1/4 cup granulated sugar
1 large egg
1 tsp vanilla extract
1 1/2 cup all purpose flour
1/2 tsp baking powder
Red and Blue M&M's

- Heat oven to 350 degrees, and place 8 cupcake liners in a muffin pan.
- In small bowl combine flour and baking powder, set to the side
- In small sauce pot melt butter and then whisk/stir in both white and brown sugars.
- Allow mixture to cool slightly for just a few minutes, then whisk/stir in egg and vanilla.
- Now stir in flour mixture just until no streaks of flour are left and mixture looks uniform.
- Divide batter equally among cupcake liners and place in oven, baking for 15 minutes.
- After 15 minutes remove cookie cups from the oven and place desired amount of M&M's on top each cup.
- Place cookie cups back in oven and bake for an additional 10-12 minutes. (I did 10)
- Remove cups from muffin tin and allow to cool for a few minutes and enjoy!

Yields 8 cookie cups or bars

**If you want to make this into a bar recipe just bake in a foil lined 8x8in pan.

Thursday, June 23, 2011

Preventing Weevils in your Rice Container


I remember growing up that I hated to start baking only to realize that the bag of flour had weevils in it. So now my eggs are ready, so is the sugar, vanilla and what have you...but flour??? Nope...the flour had become a casualty of the food war. It really is a constant battle to keep pest out of your kitchen and pantry...you have to strategize and know how to store each item accordingly. Flour for one is something that you need to keep in a cool dry place...I don't know why this was common place growing up? Maybe the way flour was processed was different in the 90's or my home was more humid back then..I don't know but currently flour weevils are a thing of the past for me now. As for rice we never had weevils in their compared to the flour. I always remembered my mom putting fresh bay leaves in the rice container and one day out of curiosity I asked her why? After my mom with her story telling self took me "back in the day" and around the bend she finally got to the point of having bay leaf in the rice container....It prevents weevils! I'm not sure if this is a tip exclusive to the Caribbean or if its practiced elsewhere but I can say that I have never noticed weevils or any other pest in our rice container so it must be working and maybe it can work for you.

Here Are a Few More Kitchen Tips

- Store flour in storage containers in a cool dry place.

- Store food in boxes and bags on the highest shelves away from most pest.

- When storing food use a rotation system where you bring the older products to the front so that they will be used first and store newer products in the back.

- Place food to be frozen in freezer specific ziploc bags to prevent freezer burn.

- Write the date on foods to be stored in the freezer so that you have an idea of how long its been in there.

- Store vegetables in the fridge with paper towel on the bottom to absorb moisture and prevent them from rotting to quickly.

- Keep citrus away from your bananas since they cause your bananas to rotten.

- Keep your potatoes in a cool, dark, and dry place.

- If you have a fruit fly/gnat invasion a small bowl or cup of apple cider vinegar near the infestation should help the problem. 

- Never place hot food in the fridge. It raises the temperature of the refrigerator and compromises the quality of the other food inside. Can you say rotten milk?!

Wednesday, June 22, 2011

Pink Room Catering News


Green Salad with Raspberry Vinaigrette

Soooo this past friday my company Pink Room Catering had an order for a graduation party right in Park Slope. We did the entire food order excluding desserts. The menu consisted of mainly caribbean fare outside of the veggie tarts. I am happy to report that the food received rave reviews and nothing was left over. As a caterer just hearing that your food was gobbled up because it was great is the most satisfying thing ever. I was in iron chef mode trying to get everything out on time but I managed to snap a few pics from the order. 
BBQ Chicken with Bajan Fish Cakes

Veggie Tarts
Baked Macaroni Pie

Mixed Beans

I hope this didn't make you salivate too hard and don't forget if your in the New York City area and looking for exceptional catering service to contact us here in the Pink Room at pinkroomcatering@gmail.com. 

Tuesday, June 21, 2011

End of June Cupcake Criminal Happenings: The Garden

Click to see it larger!
The summer solstice starts tomorrow and I am excited to revel in the excitement of my favorite season. Summer to me means outdoor parties, bright colors, festivals, and carnivals. The foodie in me loves summer because it means the smell of charred food on a grill, abundance of fresh juicy fruit, and creamy cold ice creams or sorbets. I really cannot wait to churn up a couple batches of ice cream and sorbets with some delicious strawberries, blackberries, gooseberries or any berry that I find in the farmers market.
Now I want to show you all some garden progress and plants that I bought to add to the greenery on the fire escape. The main picture on the top shows from left: The spring onion that is coming up great, next the asters that I may have planted too closely but they seem to be doing fine, then the morning glories which I'm training to cover the fire escape, and finally the curly parsley that was off to a painfully slow start but as of recent seems to be growing in hyper speed! Here are a few more pictures.
The carrots have sprouted so much in just a few weeks!

Strawberries!
Theses Strawberries were bought at USQ farmers market for $1, I didnt want to buy too many plants because I know strawberries take a year and a sunday to grow and its already coming to the end of their season.
Sweet Peas climbing the trellis I made for them. 


The wildflowers are in full bloom.
The sweet peas are strangling everything around them especially the wildflowers, I am patiently waiting for them to flower.
Wildflower Buds.
Marigold Disco Mix

These are the tomatoes. Im not sure if this lil guy was harmful or not!  I saw no damage so left it.

Season two of my gardening project seems to be coming along well, Ive made some mistakes but Ive also learned so much from last year. Im thinking of trying hydroponics next year once the funds are there.  

Monday, June 13, 2011

The Best Trinidad Bake and Saltfish

I was tempted to bite in before the picture!

Bake and saltfish along with doubles has got to be the quintessential Trinidadian breakfast, it is something that contains just a few ingredients but its just delightful and filling. Bake isn't actually baked its a type of fried dough usually made into a disc shape. Saltfish is salted cod that is boiled until most of the salt is removed, then is sauteed with different aromatics. Now that we have the descriptions out the way let me tell you that there are two types of fried bake that I have come across. There is the light bake that has the little pocket inside perfect for savory fillings and then the heavier thicker version which can fill your belly through a long days work. I'm partial to the first version but my mom likes the latter and that's the kind she likes to make. Since she likes the heavier version I had to experiment on my own and learn to make the light version with the coveted pocket in the center. Something this simple was no easy task for me, try after try I just wasn't getting what I wanted. All the recipes online were either to heavy and greasy or just did not resemble anything close to a fry bake...this was frustrating!! Just when I was getting ready to quit success came in the form of a golden, crispy, light fry bake! Now that I have the fry bake down I can go ahead getting my saltfish together, now saltfish I can make with my eyes closed! When I got my saltfish and this new bake together it was heaven. I just know I had to post this recipe and share it with the world.


Saltfish
1lb salted cod
1 medium onion, chopped
3 cloves garlic, peeled and chopped
2 pimento peppers, chopped
3 tbsp oil
1 small tomato chopped (optional)
black pepper or Trinidad Pepper Sauce to taste

- Boil codfish until salt level is tolerable to your taste, drain and set to the side.
- In saute pan heat oil over medium/high heat.
- When oil is hot add in onions, garlic, peppers, and saltfish. Saute together for 5 minutes.
- Add in tomato if using, black pepper/pepper sauce, and saute for 1 more minute.
- Turn off stove and place saltfish to the side.

Fried Bake
makes 6 

3 cups all purpose flour
1 1/2 tbsp baking powder
 1/8 tsp or a pinch instant yeast
1 tbsp sugar
1 tsp salt
1 tbsp shortening
1 cup ice water
frying oil

- Mix all dry ingredients in a bowl.
- Rub in shortening to flour with your fingers or a pastry blender if you have one on hand.
- Add in water and knead until a soft ball is formed. 
- Cover with a cloth and let dough rest for 15 minutes
- After 15 minutes re-knead quickly and let the dough rest for an additional 15 minutes.
- While dough is resting fill a frying pan with oil and let it heat to 300 degrees.  
- Cut dough into 6 pieces and form into little balls.
- Dust each piece of dough in flour and use a rolling pin to shape the dough into a flat circle about 1/4 inch thick.
- Fry each piece of dough until golden on each side. Take care not to constantly flip the dough. Let it cook on one side and then flip only once to cook the other side.
- Drain fried bakes on paper towel and cool for 2 minutes. 
- Cut and fill with the saltfish or any other filling of your choosing.


Oven Fries with Rosemary and Sea Salt

Herb-iforous heaven lol!
So summer doesn't officially start until next week but I'm well on my way to integrating lighter recipes into my cooking repertoire for the summer season. I usually make oven fries at home since deep frying is such a task having to pull out a large pot and so much oil. I also believe oven fries are so much healthier for you and its easier to integrate different flavors with this method in my opinion. For this particular recipe I used Idaho potatoes but russets, yukon golds, and red potatoes should work just fine. This recipe also gives you so much leeway in the variety of herbs and spices you can use, the possibilities are endless. These fries are really quick and tasty, I paired it with a salmon burger but you can let these flavorful fries accompany your favorite steak, bbq chicken, burgers, or grilled fish.
Crappy pic...Tasty fries!
Oven Roasted Fries with Rosemary and Sea Salt
Serves 2
1lb idaho potatoes
2 tbsp olive oil
1 tsp sea salt
1/4 tsp red pepper flakes
1 tsp fresh rosemary 
cooking spray

- Heat Oven to 400 degrees
- Wash and scrub potatoes
- After washing cut potatoes into french fry shape. Heres a great tutorial on how to make perfect french fries.
- Rinse potatoes and pat dry.
- In a large bowl toss the potatoes along with sea salt, olive oil, red pepper, and rosemary.
- Take a large sheet pan and coat it with cooking spray. 
- Proceed to spread seasoned potatoes on the sheet pan in a single layer.
- Place fries into the oven and cook for 25-30 minutes or until fork tender and crisp.
- Remove from oven and enjoy!